Customizing a fire surround .
Sometimes it's nice to co-ordinate a particular miniature to match the furnishings etc, or spruce a tired miniature up!
It is also a good place to start if you have never done any DIY! Some years ago I bought 3 fire surrounds all of which I customized them to fit into the colour schemes of the rooms they were to be fitted. One of the surrounds was a large wooden one with 2 mantles on it, this is the one I shall describe what I did to it..
First of all I made a lit fire ,a brass grate and fret. Then I added a little gold, water based acrylic paint to the surround and hearth, designed and printed some tiles for the surrounds and hearths matching the colour schemes of the rooms, printable sheet for this project below. Lastly I made a mantle drape by cutting the shape out of card and sticking material and fancy braiding on it with double sided tape. Lastly, I fastened it to each of the shelves on the fire surround.with double sided tape. Alternatively, you could use a little fancy lace for the mantle drape!

Here is a printable sheet of tiles, which I have designed myself, to use on a fire surround and hearth project.
Print at 100% on A4 photo paper. Stick on with prit glue stick or double sided tape.
Anyone wanting to put my fire surround and hearth sheet on their site must please ask me first and display my url:
http://www.pattysminiatureworld.co.uk with it.
But most of all HAVE FUN!
The tiled paper to print yourself is here and scroll down the page!
Customizing a plain coloured resin fire surround.
This was the second fire surround I bought.
It was made of a pinky cream resin but I decided to give it a cast iron look with a gold trim and high-lights.
After making a fire and brass fret, I cut a brass hearth plate from thin brass sheet,
then I gave it a coat or two of black
water based acrylic and then I used gold water based acrylc
to touch up the mouldings.

Building your own lit fire
I have been asked by a visitor how I made the fire shown above in the black and gold fire surround. OK here we go!
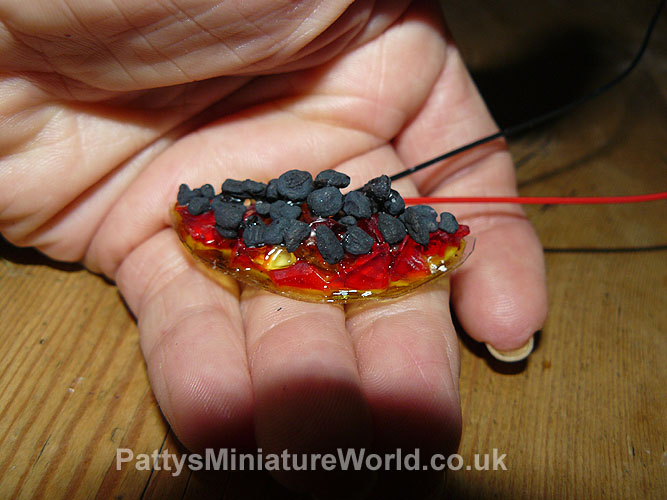
I build all my fires using grain of wheat bulbs ,PVA glue, smallish glass or any clear beads
in red,yellow and orange,(any shape will do) and some black acrylic paint or miniature coal.
First you must check what voltage you need ,6 volt or 12 volt bulb, depending on the size of your transformer. I cut a base for my fire using a piece of thin metal sheet or stiff plastic to the size I require. I then set my bulb in sticky PVA, I put some PVA on my base and let it go really sticky, around 10 minutes should do it, then I set my bulb in to it. A this stage, patience and time is needed as you will have to put some more PVA on top of your bulb and hold it in place, because the next thing to do is to stick coloured beads on top of the bulb and glue,the idea is to hold the beads,bulb and coal together with the PVA. Always place yellow in the centre of the fire (hottest part) then orange and lastly red. The idea is to let the bulb shine through the beads. When this is done let the fire stand for 12 to 24 hours so the PVA can set, and don't worry the PVA will set clear! Next glue some miniature coal onto the beads. If you don't have any miniature coal you could put blobs of black acrylic paint here and there on top of the beads.
The finished fire is below , all ready to be fitted!
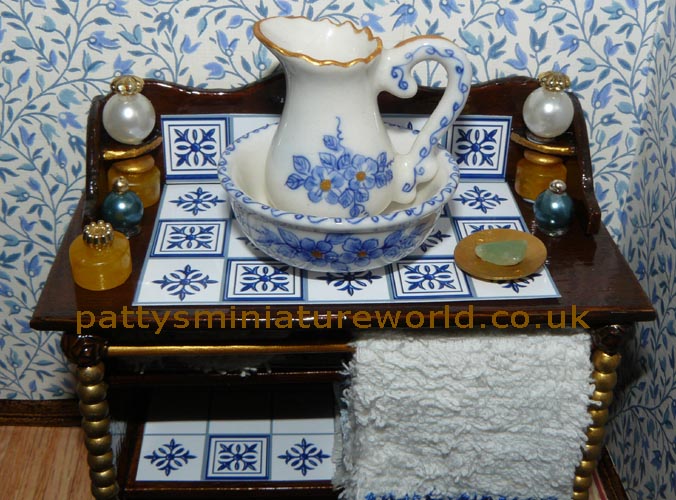
Giving a colour co-ordinating face lift to a wash stand.
I made a wash stand many years ago and always thought it would look better with some tiles on it. Recently, wile designing some tile sheets on my computer, I came up with a colour and design that would fit with the colour scheme in the room where my wash stand is. After printing the tiles on photo paper I cut out some tiles and stuck them on with glue stick. The tile sheet is available below the finished wash stand.
Before

After
The tiled paper to print yourself is here and scroll down the page!
More items will follow so do call back!