The ways of basing and the reasons for this size or that are too complex to go into here BASING THOUGHTS for a discussion on the subject), the purpose here is to outline some techniques that might be of some use
.
Right now we have our painted strips finished it a good idea to give them a coat of gloss varnish ( tried loads in my time but been impressed recently by the HMG sprays get mine from Figures in comfort http://www.figuresincomfort.net/).
A coat of gloss not only brings the colours out but also stiffens the figures up a little and gives them an easy to clean surface.
Now I like to base my figures in a way that looks best to me rather than following a particular set of rules but of course the following can be adapted to any specific regime of basing you want.
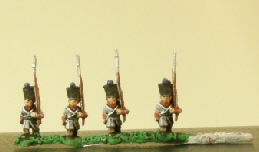
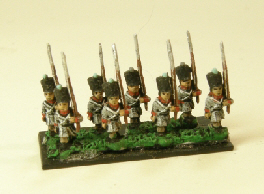
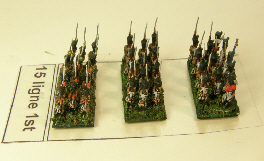
For my French infantry I use 30x 15 mm steel bases for the 4 center companies and a 15x15mm for each of the elite companies. These bases come galvanised in black and before I use them I give them a coat of green paint. I haven't in this case so things show up better in the pictures.
I base in 3 ranks so the first rank gets stuck down
(use UHU myself), best to apply the glue to the base rather than the figs. As you can see no need to cut the strip. Then a second rank is added slightly offset and then finally the third rank again offset.
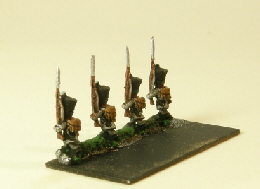
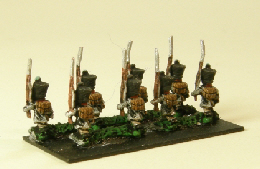

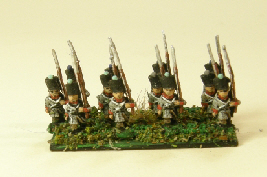
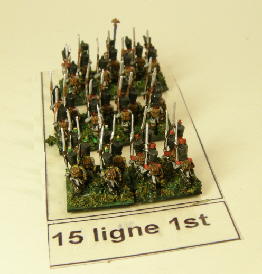
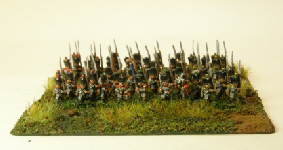
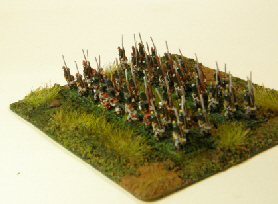
Once the figures are dry its time to add some texture to the base. I use a little soil texture paint ( use the Tamiya ones though tried the bastex one which seems very nice to) and then mix railway flock with wood glue and water to make a thick paste.
Using a scalpel and a wet No 3 brush I then spread this between the figures ( tricky this bit) and around the base.
Now you can take a shortcut here. You can use Baetex ( or something similar) to do the entire basing job.
Mix it very well then plop a blob of on the base, about 3mm depth, leave for a little while for it to dry a little and then pop the strips on as above. Only tried this at an experimental level at the moment but shows great promise. When I pick some green variety up I'll give it a proper go.
Once the mixture has dried ( a little heat will speed things up here) its time to add a little colour.
A dry brush with a mix of greens will give the bases a little contrast and add to the effect nicely.
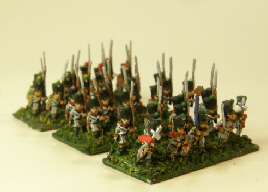
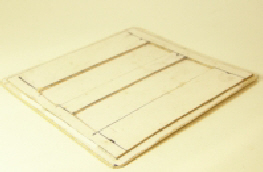
Now you a Regiment based. In order to make things on the table a lot easier I make movement trays for the units.
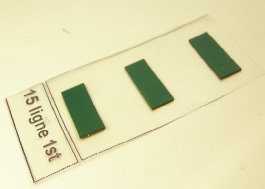
Easiest way I've found is to use overhead projection film.
You can print the size you want on a desk jet printer and include the unit reference at the end of the movement tray as well. If you print these a matching colour to the surface you normally play on the text will disappear. All you need to do to see it is slip a piece of white paper under the edge and you can see the text clearly. ( I've kept them black here so things show up in the pics).
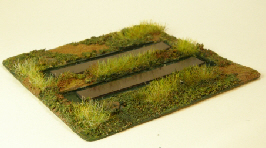
I add a magnetic strip ( the rolls of tapecare great for this http://www.magneticdisplays.co.uk) in three rows across the tray which means of course the figures are kept safe and the whole unit can be popped away for storage.
As the part of the movement tray with the text is going to used to push the tray around the table its worth reversing the text so that its printed on the underside of the transparency and away from finger induced wear and tear.
The advantage of this sort of basing is that you adapt it for any particular set of rules you want. For instance if you want to use the brigade style basing you can make movement trays the proper size either out of transparency as above or do something more elaborate as here.